Regions
Regions are administrative domains, used to organize Sites and other Regions. They can be nested recursively. A Region might represent a continent, country, city, campus, or other area. A Region can contain Sites and other Regions.
Additional information on Regions is in the Regions section of the Nautobot documentation.
In the following exercise, we will create three Regions:
- North America
- Intended to hold Regions that represent each component country
- Canada
- Intended to hold Regions that represent markets in Canada
- Vancouver
- Intended to hold Sites within the Vancouver market
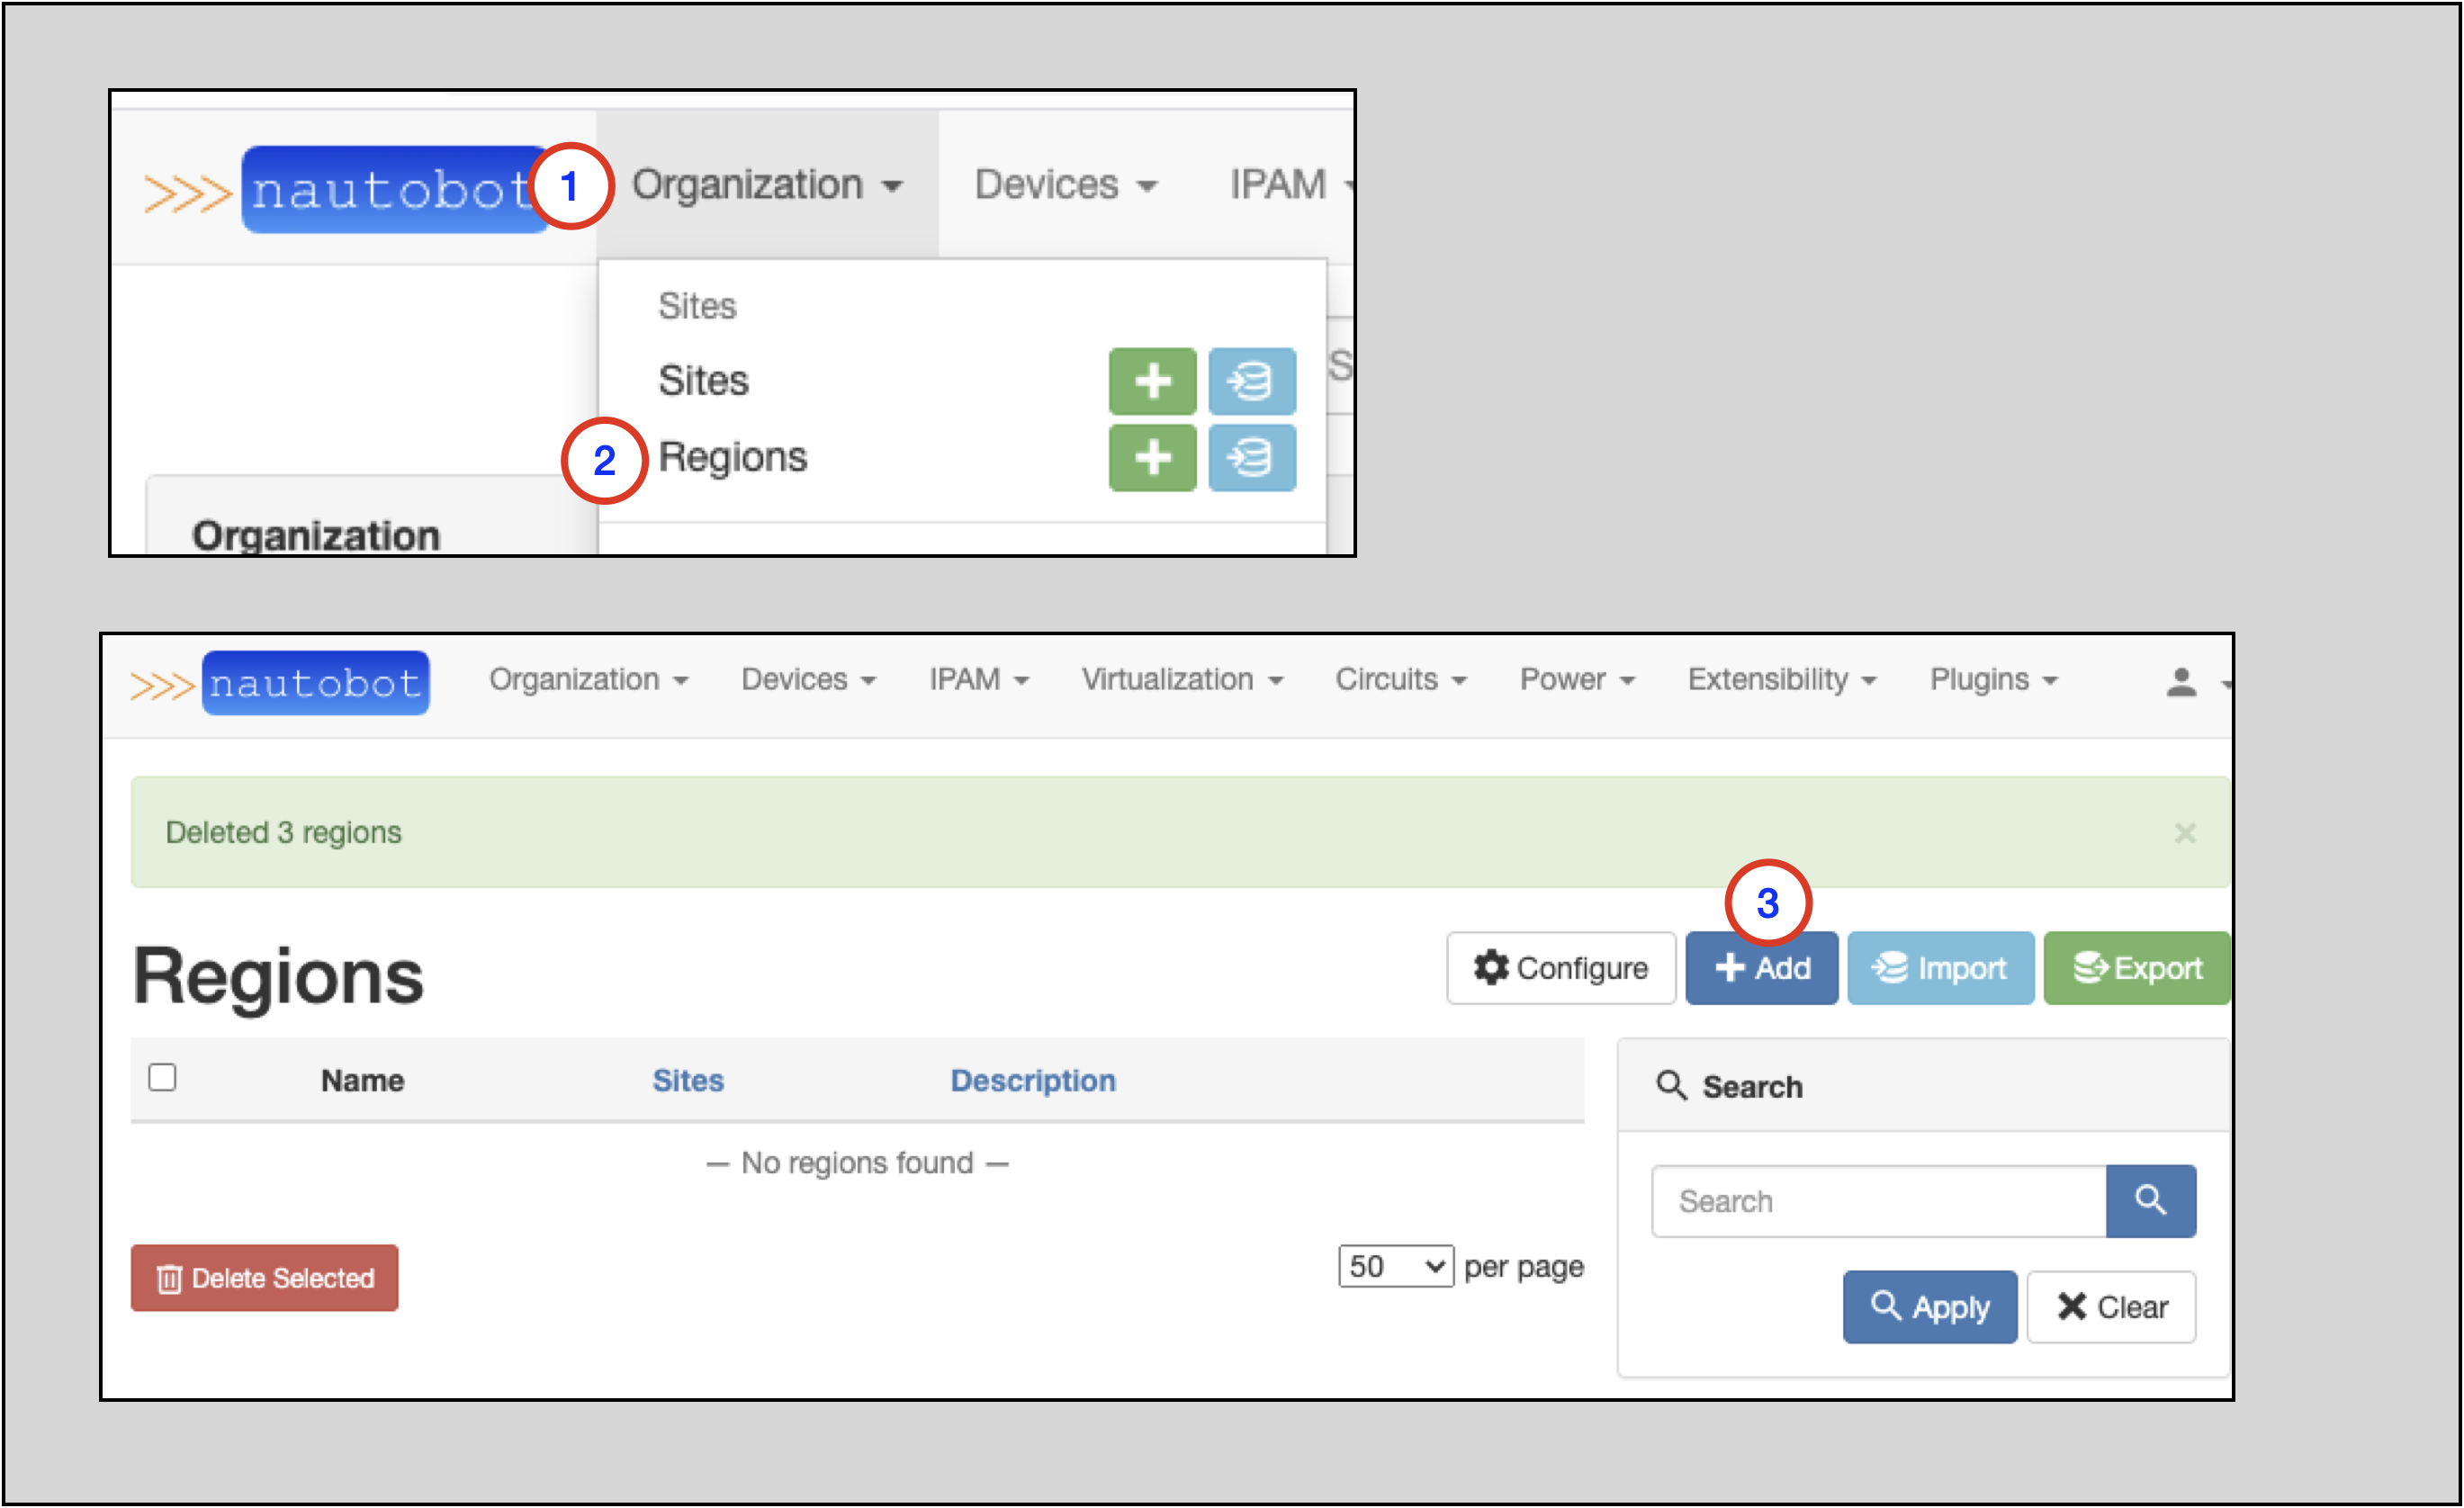
Creating a Region
To create a Region:
- Click on Organization in the top menu
- Click on Regions in the Organization drop-down menu
- From this page you can view any existing Regions
- Click on the blue
+ Addbutton
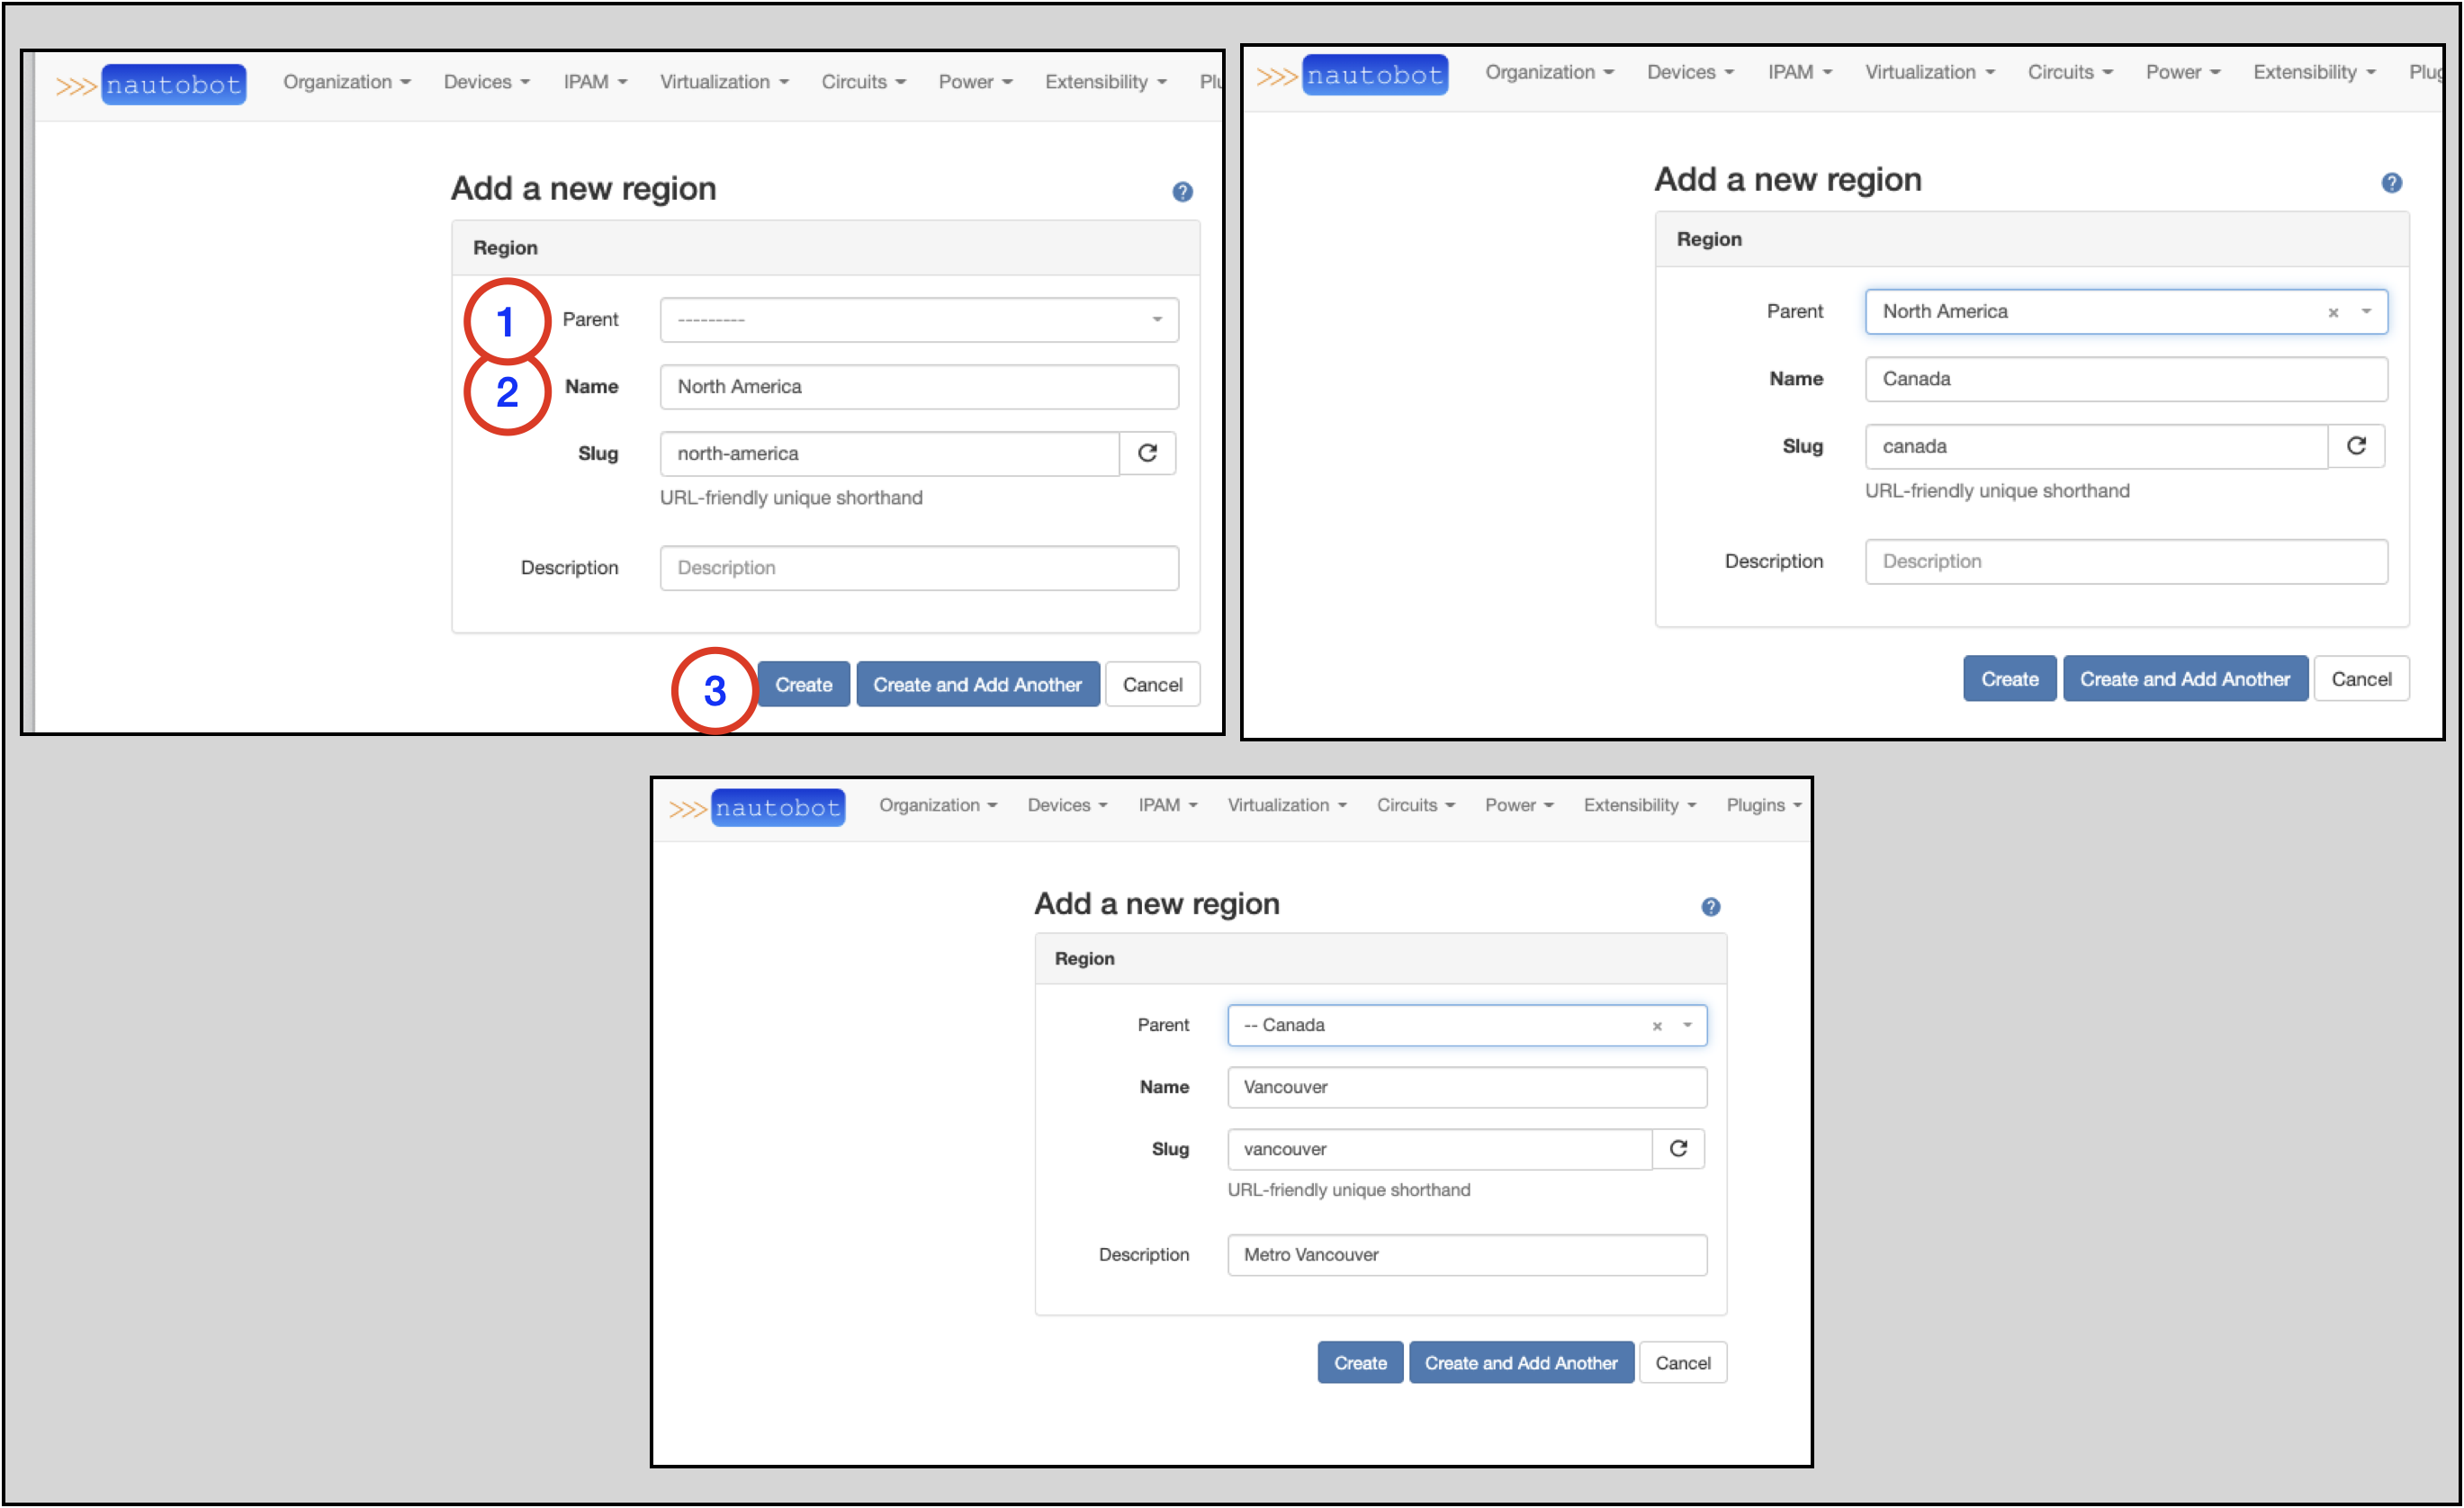
The screenshots below show the creation of each Region.
North America:
- Leave the
Parentblank; North America will be a top-tier Region - Populate the
Nameto beNorth America- The
Slugwill auto-populate based on theNamefield, but can be manually overwritten
- The
- Click on the
Create and Add Anotherbutton
Canada:
- Select North America as the
Parentfrom the drop-down menu selector - Populate the
Nameto beCanada- The
Slugwill auto-populate based on theNamefield, but can be manually overwritten
- The
- Click on the
Create and Add Anotherbutton
Vancouver:
- Select Canada as the
Parentfrom the drop-down menu selector - Populate the
Nameto beVancouver- The
Slugwill auto-populate based on theNamefield, but can be manually overwritten
- The
- Click on the
Createbutton
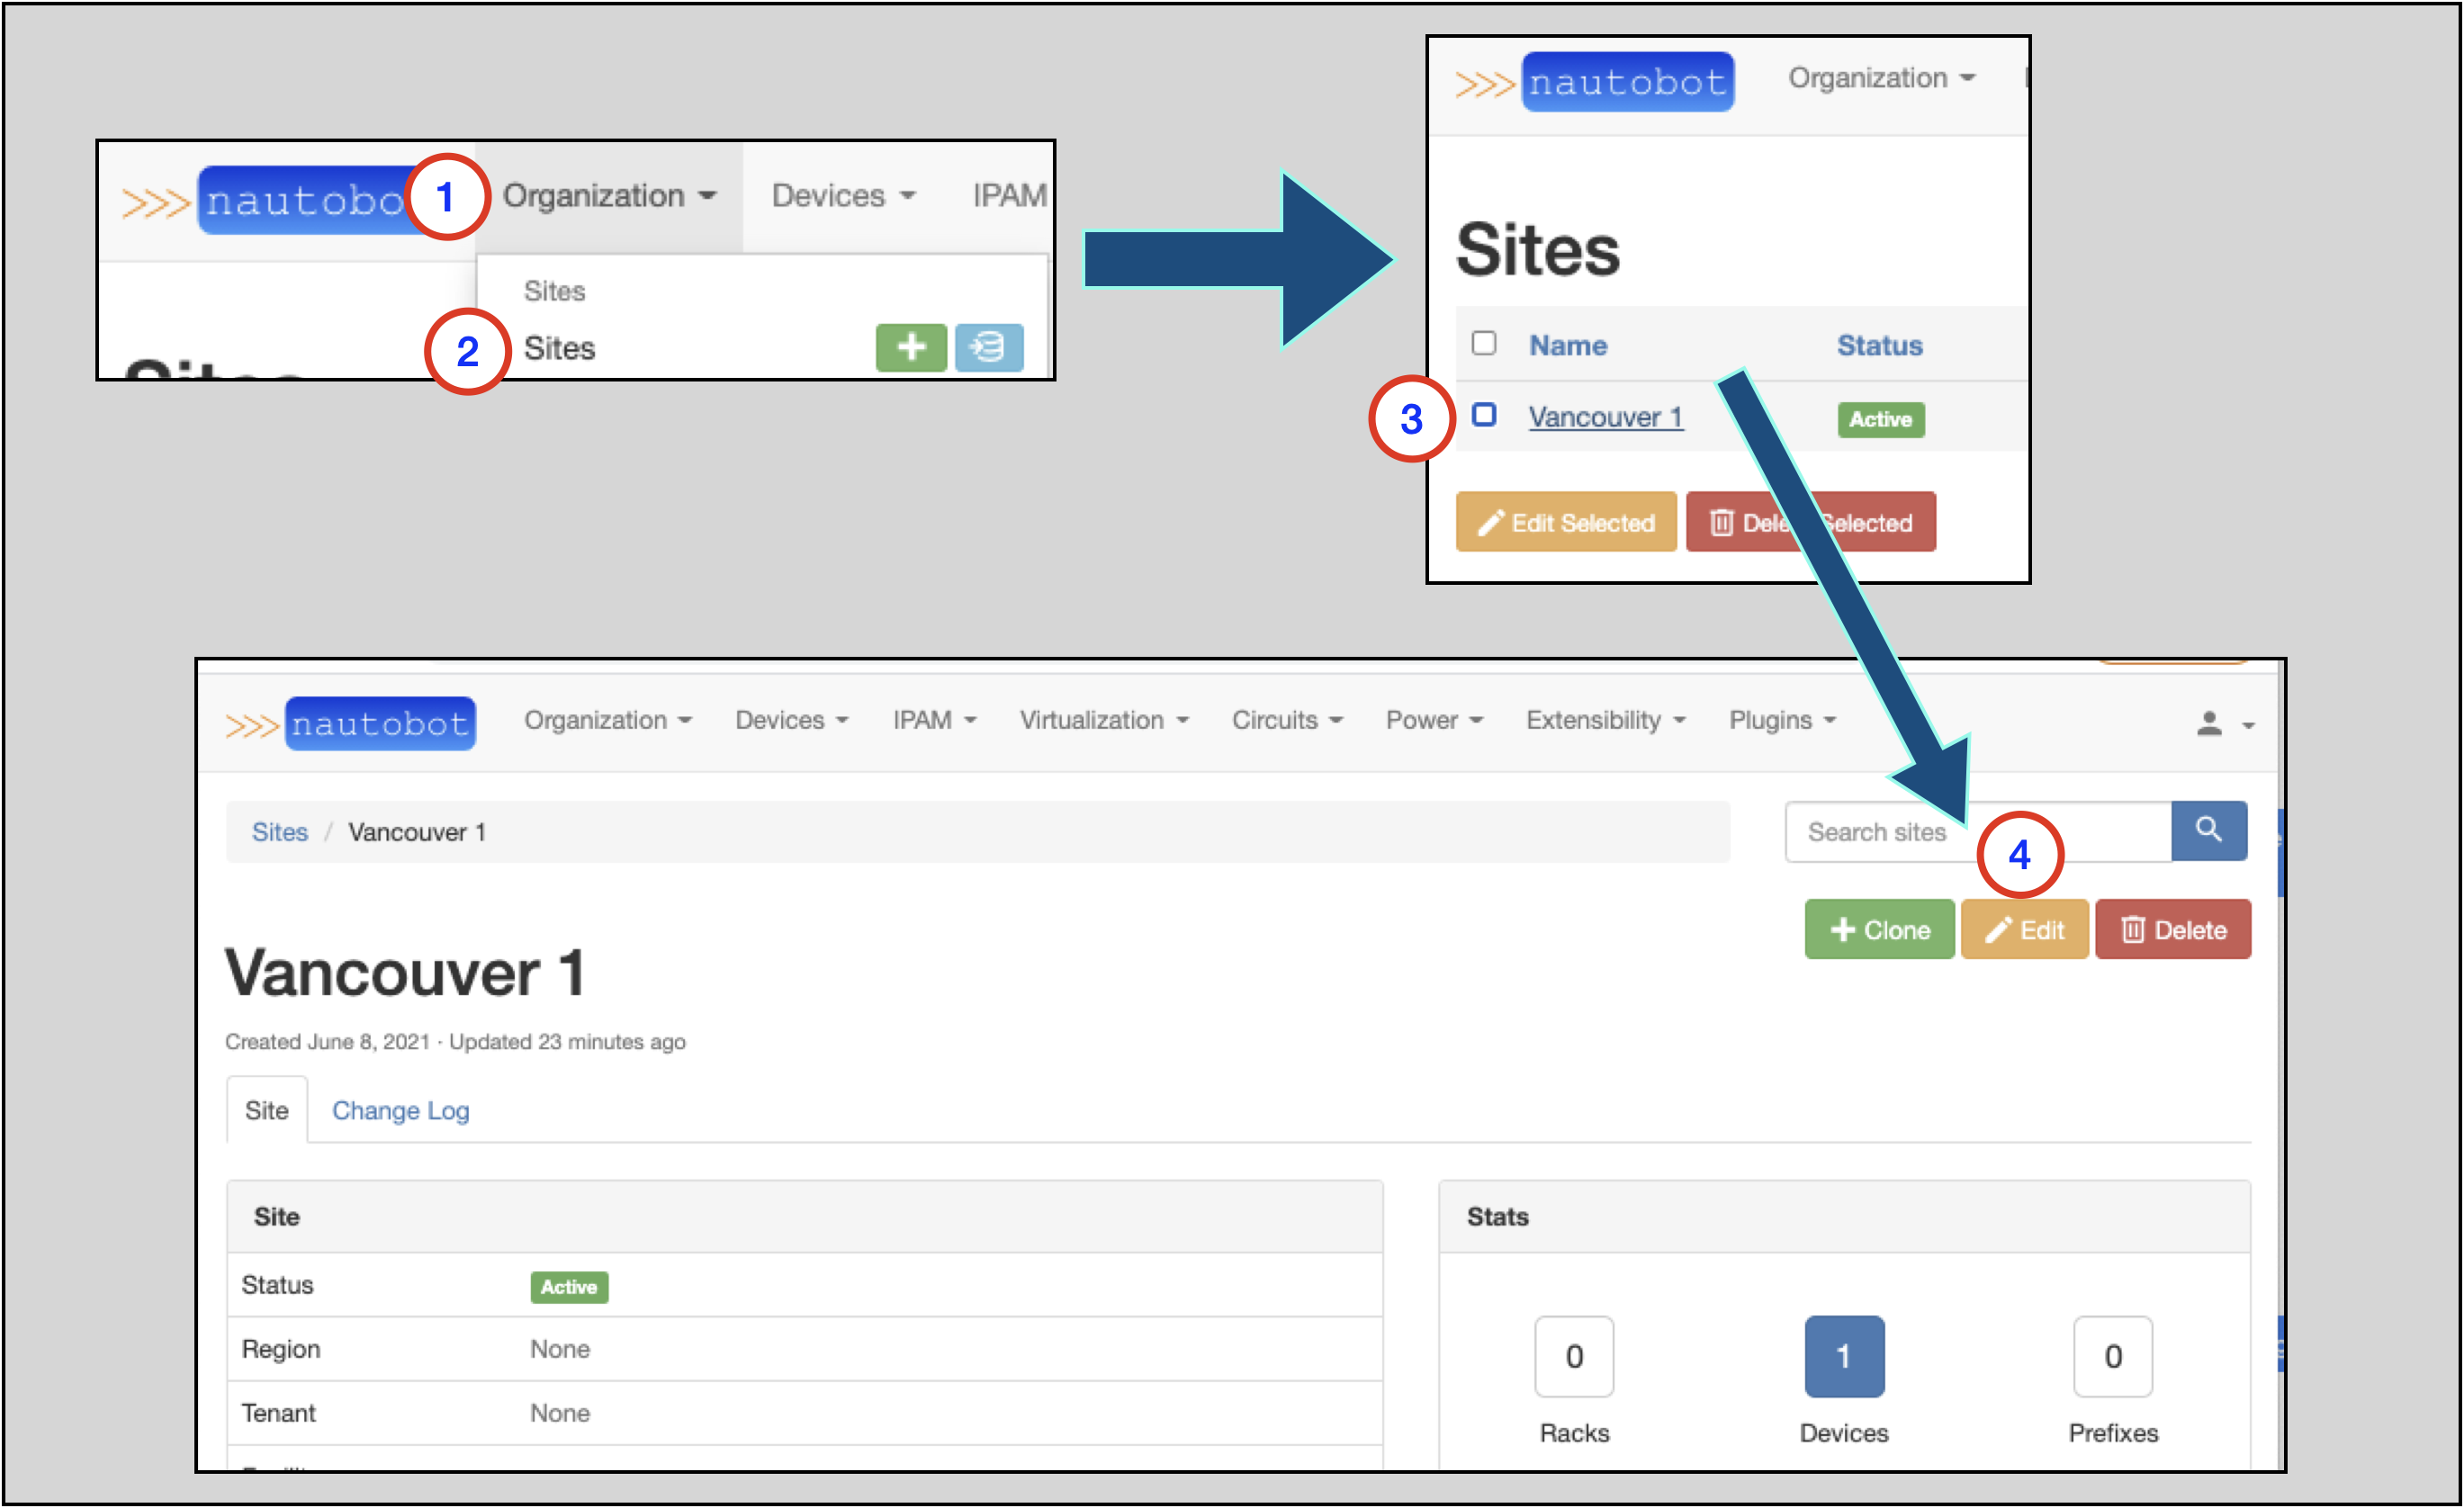
Adding a Site to a Region
It's quite easy to add an existing Site to a Region.
To access the page where you can modify a Site:
- Click on Organization in the top navigation menu
- Click on Sites in the drop-down menu
- The Sites page will appear; click on the specific Site you want to modify (
Vancouver 1in this example shown). - On the page for the Site, click on the
Editbutton
Once you're on the Editing site form:
- Look for the
Regiondrop-down selection menu and select the appropriate Region - Observe that the correct
Regionfor theSiteis selected - Click on the
Updatebutton
The page for the Site you updated will appear again, showing the updated Region hierarchy for the Site.
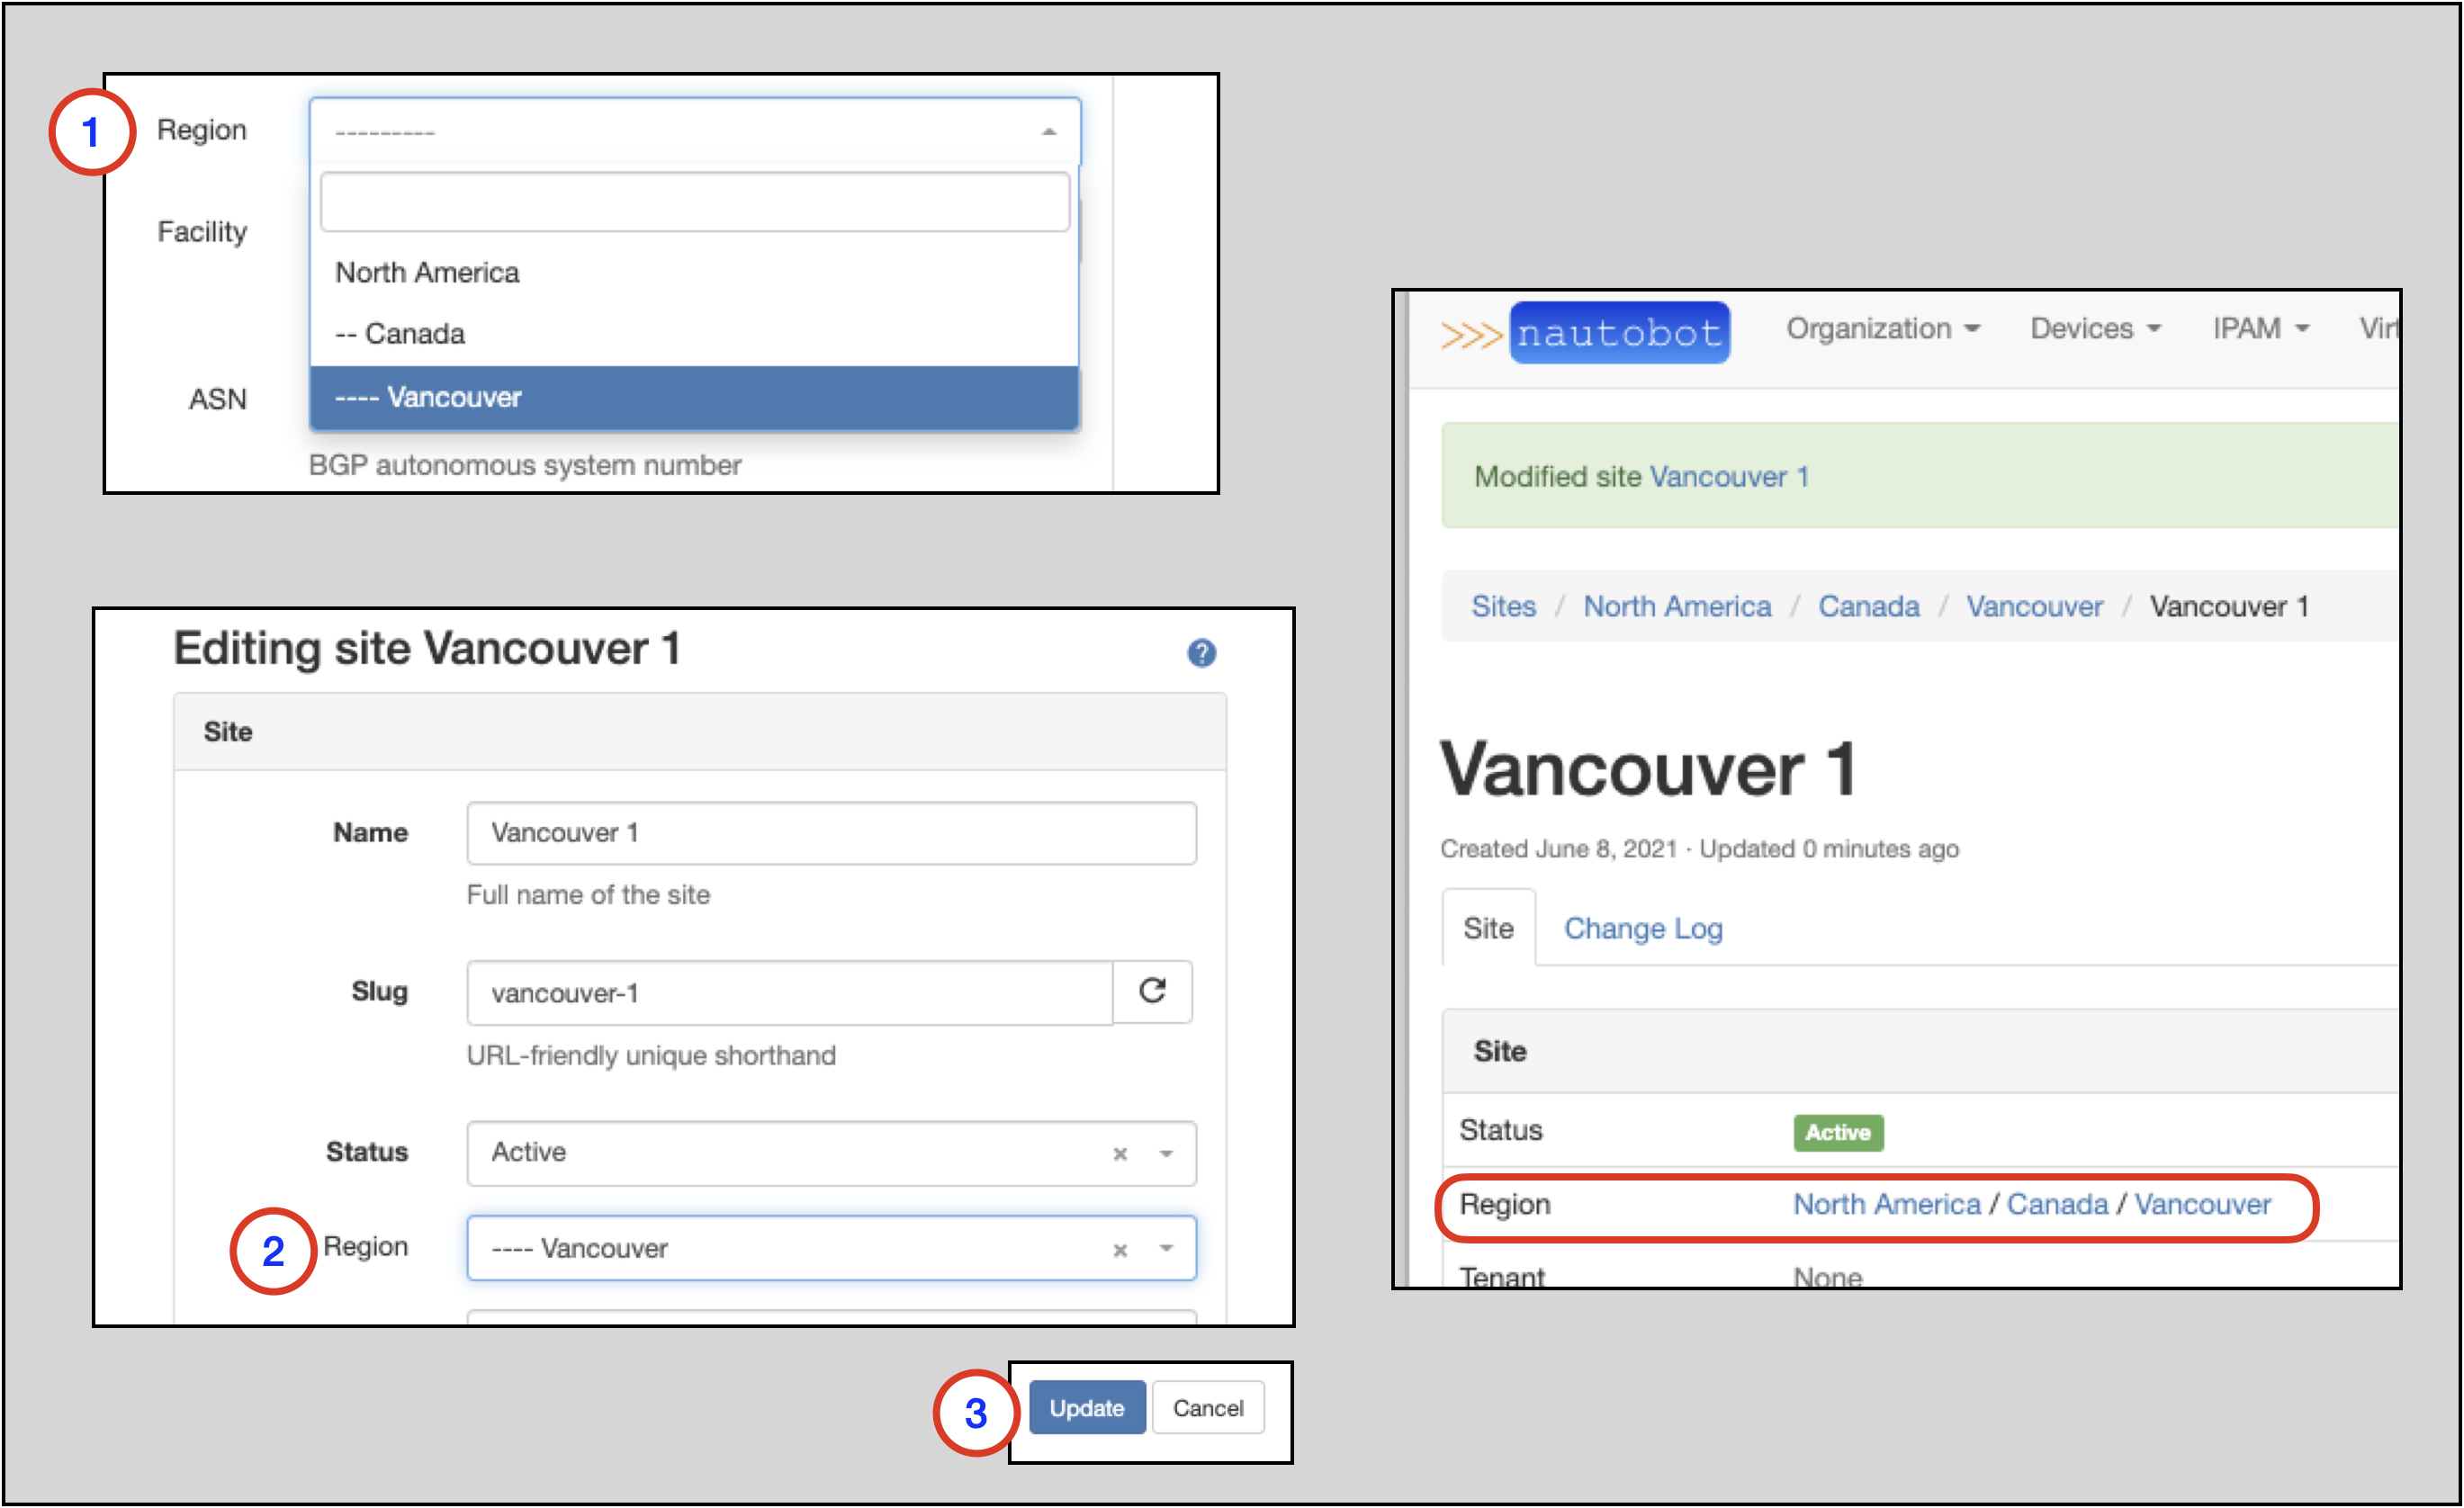
Note
In the example, notice that we assigned the Vancouver 1 Site to Vancouver, which is tier-3 Region.
Notice that the Regional hierarchy is displayed for the Vancouver 1 Site: North America / Canada / Vancouver